
Registering your nick with NickServ
Your nick is your identity on ScoutLink. If you don’t want others to use it, then you may like to register it.
You don’t have to register your nick to use ScoutLink IRC (Webchat) but there are benefits of doing this. NickServ is an IRC service that allows people to register their nick and prevent other users from using it. Below, we will show you how to do this! Please note: in some clients, /msg NickServ can be shortened to /NickServ or /ns, but if you’re unsure, use the long version of the command.
Where do I type the commands?
In your chat client, you will have a server window titled “ScoutLink” that contains some technical information. It is best to type the registration commands there, rather than in the chat channels. This reduces the risk of you sending your password to everyone in chat if you get the commands wrong.
Commands to register your nick
- Make sure your current nick is the one you want to register. If it isn’t, type
/nickfollowed by the nick you want. For example,/nick ExampleNick - Type
/msg NickServ registerfollowed by a password of your choice, and then your email address. For example,/msg NickServ register mypassword me@example.com. Your nick will now be registered. - Check your email for a verification code – you will need to enter this into IRC to validate your account. If you don’t get this within 24 hours your account will be dropped so you can register it again. The most common cause is a misspelling of your email address when registering.
- From now on, when you join ScoutLink IRC (Webchat) using your registered nick, you will have to login/identify yourself. NickServ will give you 90 seconds to do this before changing your nick for you. This is to prevent other users from using your registered nick. There are two ways you can do this, but we will show you the easiest way. Type
/msg NickServ identifyfollowed by your password. For example,/msg NickServ identify mypassword. You will now be logged into your account for your registered nick. - If you want to register another nick, you can link it to your account. To do this, first make sure you are logged in using the the method in point 3 above. Then change your nick to the new nick that you want to register using the method in point 1 above. Now type
/msg NickServ group. Your new nick will now be registered to your account.
NickServ comes with more options which you can see by typing /msg NickServ help. If you need help with anything then you can join the #help channel on our webchat (www.scoutlink.net/webchat), or you can email help@scoutlink.net directly, or using our contact form.
Step-by-step: Registering your nick on ScoutLink Webchat
The examples below are taken from ScoutLink Webchat. If you are using another client, the commands are the same but the interface may look a little different.
Access Webchat
Visit ScoutLink Webchat and enter your chosen nick. Choose a channel from the drop down list.

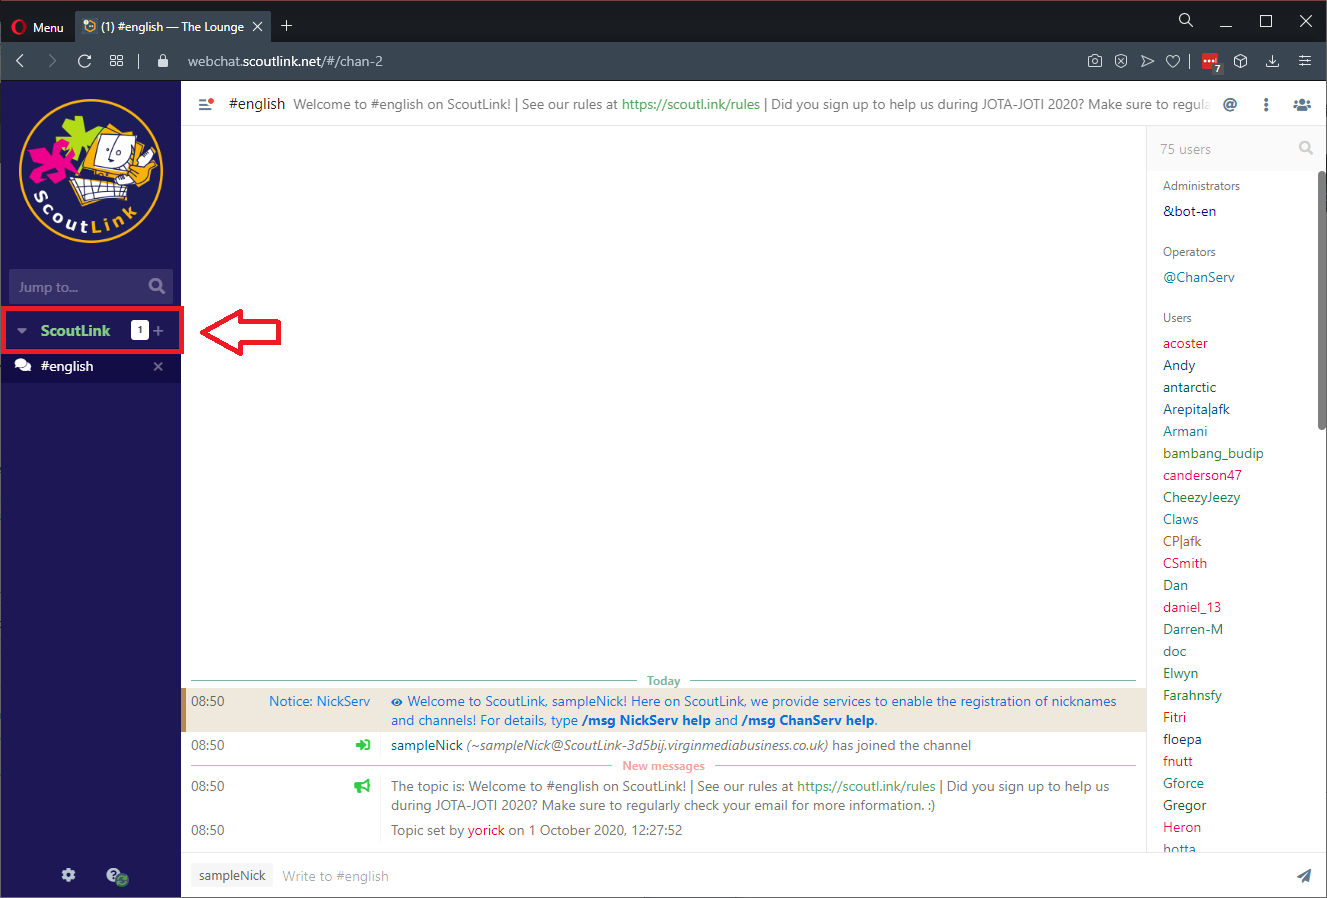
Click on the Server Status Tab
As shown below, there is a Green “ScoutLink” tab on the left hand side. Clicking on this takes you to the server window where it is safer to enter any registration commands.
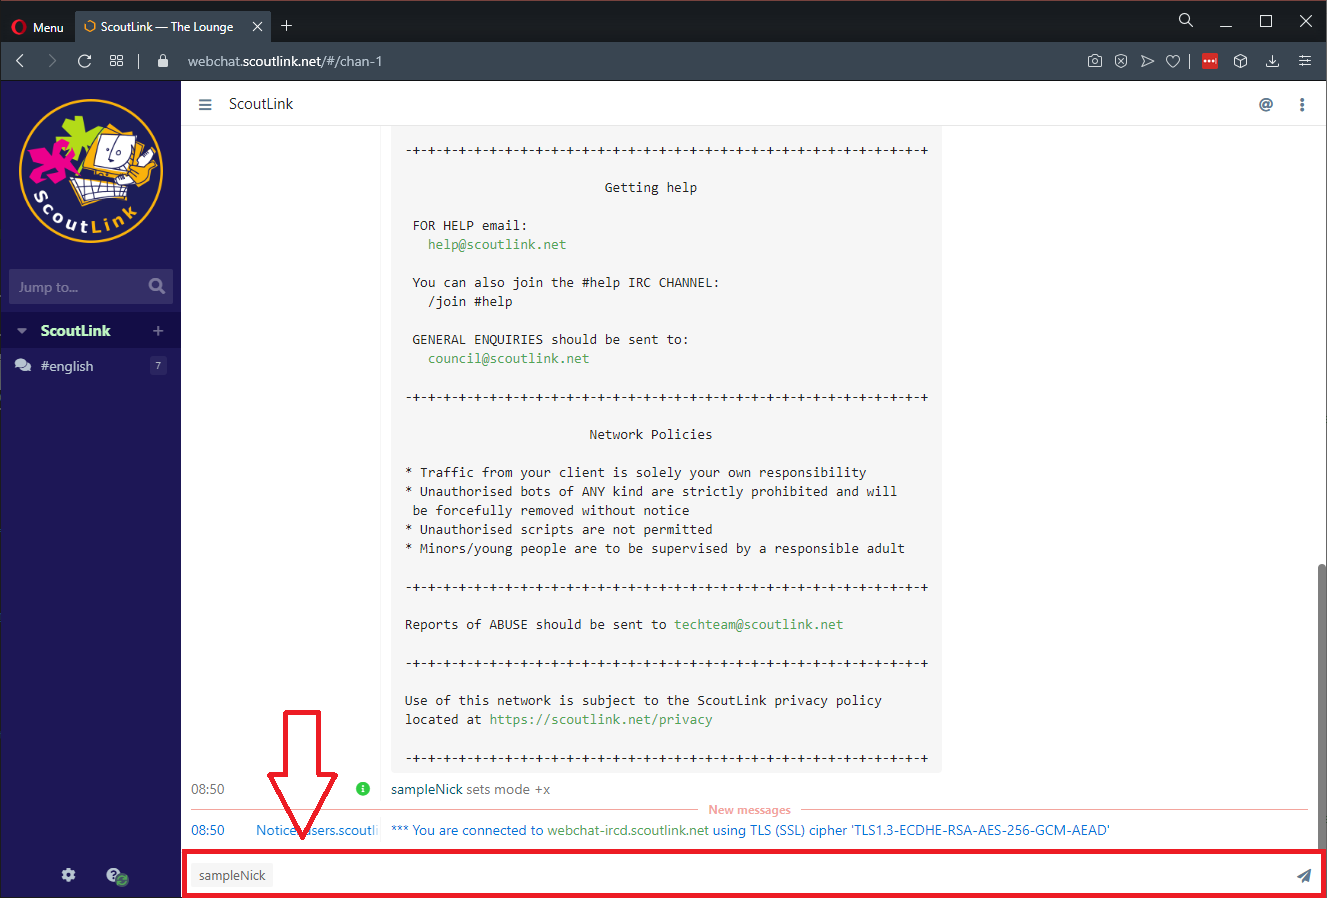
You should now see a view like the one below, with the text entry box highlighted in red to show where commands are to be entered.
Register with Nickserv
Type /msg NickServ register followed by a password of your choice, and then your email address. For example, /msg NickServ register mypassword me@example.com. Just change “mypassword” to your chosen password, and “me@example.com” to your own email address.
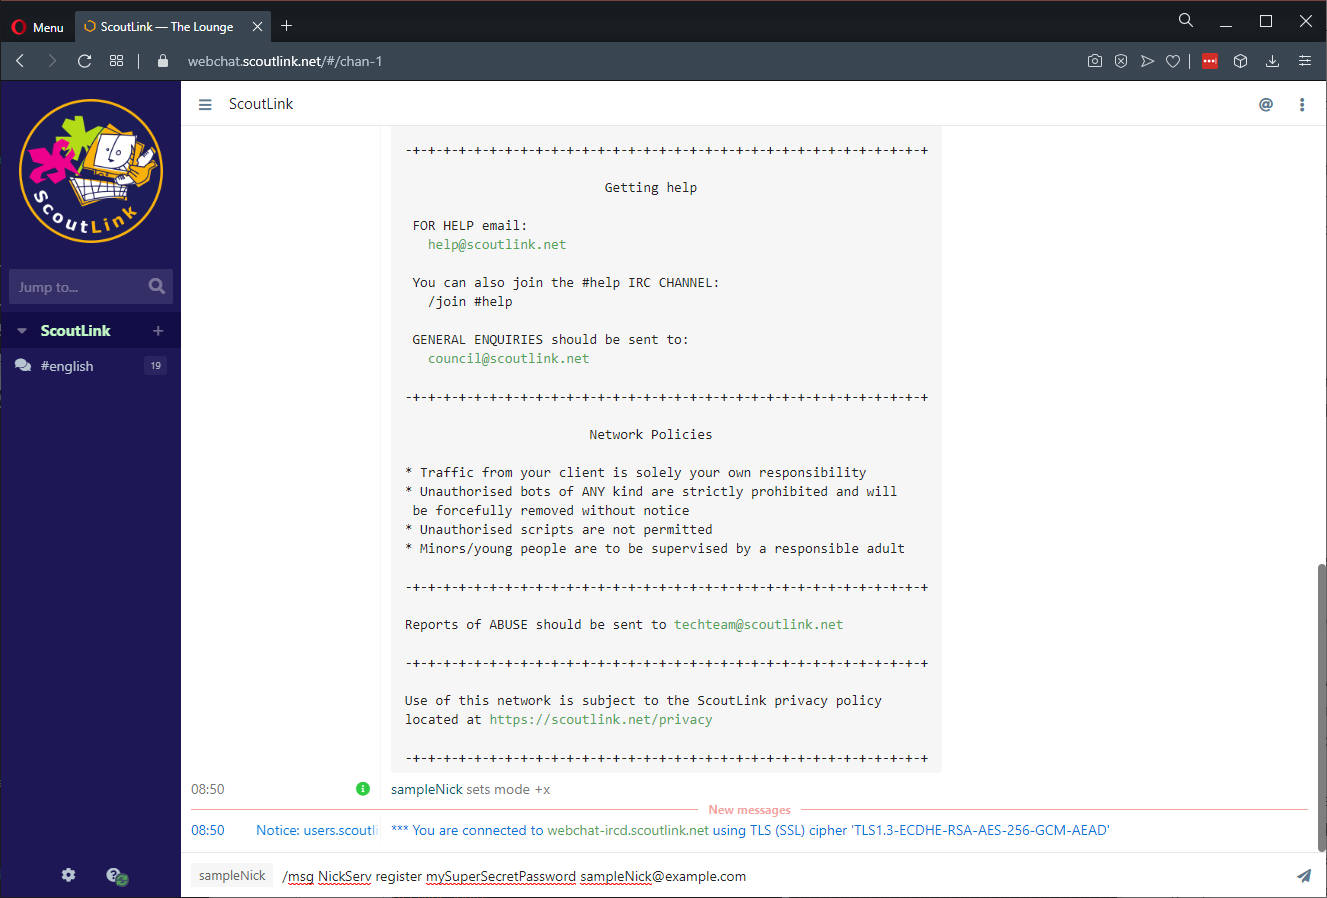
Your nick will now be registered. If everything worked you will receive an email with an additional command to verify your account. Just copy and paste it into the webchat in the same place you entered the commands above.
If you did not receive a verification request email, your account will be removed after 24 hours and you can try to register again. The most common cause of this is an error in your email address when registering.
Logging in with your registered Nick
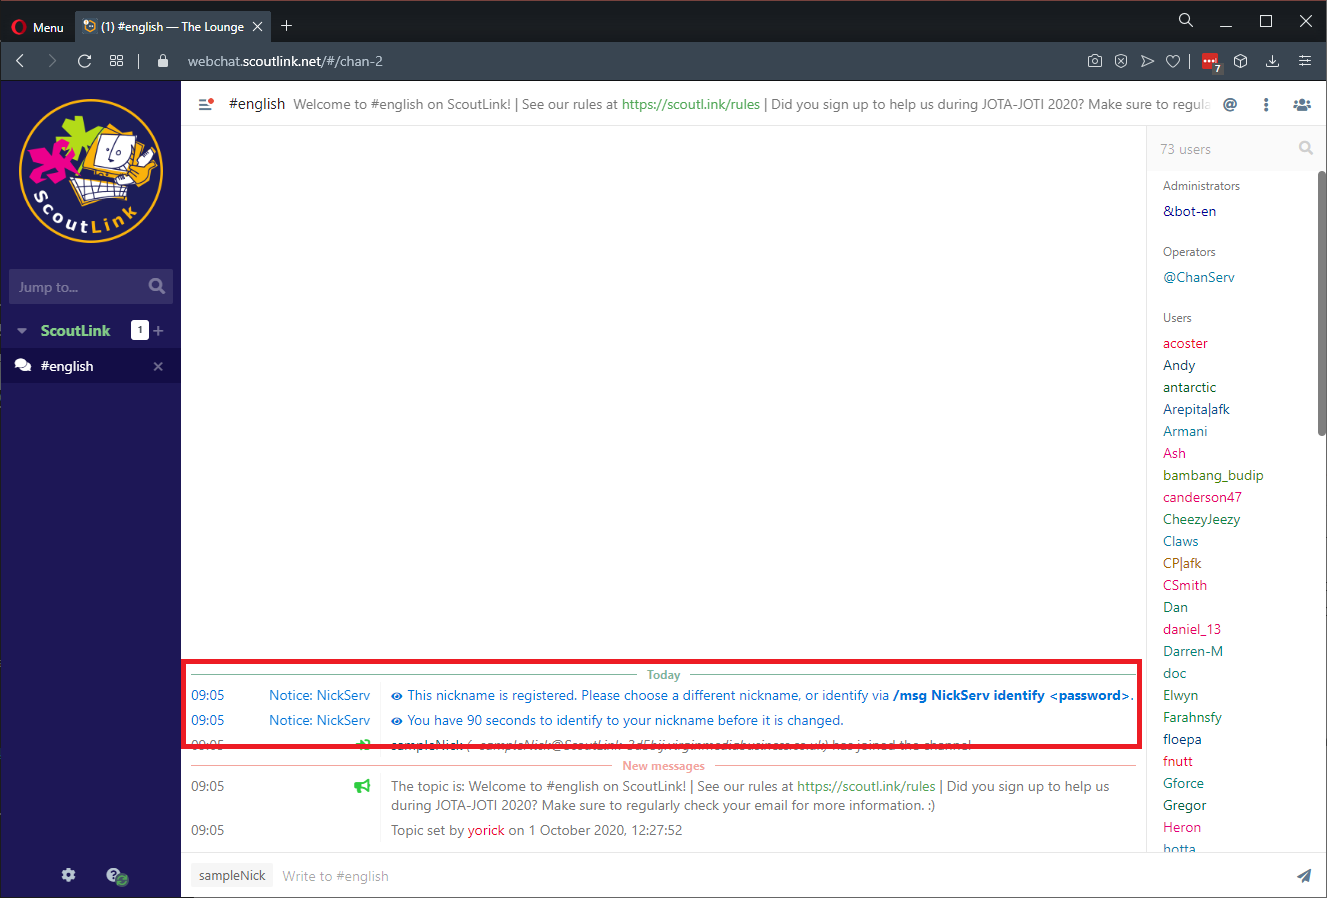
Now you have registered your nick, you will see a new message when you access webchat in future. It tells you that you have 90 seconds to identify. If you don’t do this then your nick will be automatically changed to a Guest username. This is to prevent others from accessing using your nickname.
There are two ways to resolve this.
The first is to enter the identify command in the server status window (remember to click on the Green ScoutLink text on the left hand side first)
Just enter the command: /msg NickServ identify password
Don’t forget to swap “password” for the password you chose earlier.
The other option is to tick the “I have a NickServ password” before hitting connect, which brings up a box for you to enter your password:

And that’s it! If you need help with anything then you can join the #help channel on our webchat (www.scoutlink.net/webchat), or you can email help@scoutlink.net directly, or using our contact form.